SB20 - Replacing the Bottom Bracket
Let's see how to replace an SB20 smart bike bottom bracket.
When to Replace
Bad bottom brackets are pretty easy to identify. They will exhibit one or more of the following behaviours:
- Grinding that feels like sand in the bearing when rotated slowly.
- Excessive play when pushing the cranks in and out.
- Wobbling when riding - especially when pushing hard.
What is NOT bottom bracket failure
- Clicking noises. Instead: Check pedals and look for loose crank bolts.
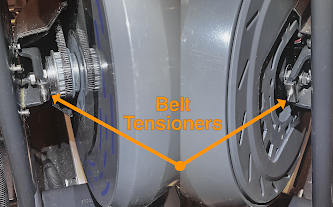
- Rubbing noises. Instead: Look for problems around plastic covers.
- Noises that get loader as you pedal faster. Instead: Check the flywheel.
Tools Needed
Car mechanics can rejoice. You have most of the required tools.

Tool Summary:
- Heat gun for loosening red Loctite that holds drive side bottom bracket fastener (alternative: hair dryer).
- NLGI #2 automotive bearing grease (alternative: bike bearing grease).
- 18" or longer torque wrench for tightening bottom bracket when reassembling (Alternative:12" wrench - it's short enough that you probably can't over tighten).
- 24" breaker bar to remove bottom bracket (alternative: big wrench and a little luck).
- 8mm ratchet or wrench for removing cranks (alternative: none).
- 12mm bolt (two possible options shown) and washer to hold bottom bracket tool in place when loosening and tightening bottom bracket (alternative: none).
- 8 tooth ISIS bottom bracket tool (Alternative: none).
- 3mm hex wrench (Alternative: none).
Summary of Work
Parts to remove:
- Front cover.
- Right (drive-side) cover and crank.
- Left (non-drive-side) crank and cover.
- Bottom bracket.
You can then re-lube or replace the BB cartridge.
Reassembly is just doing the previous steps in reverse.
---------------------
Steps
Remove drive side covers and cranks

Remove:
a. 2 x front bolts and front cover. b. 7 x side bolts and side cover.
c. Crank with 8mm wrench
(counter clockwise to remove).
Remove non drive side crank and cover

Remove:
a. Crank with 8mm wrench (counter clockwise to remove).
b. 3 x side bolts and side cover.
b. 3 x side bolts and side cover.
Using Botton Bracket Tool

a. Tool fits notches in BB
b. 12mm fine thread bolt
c. Bolt holds tool in place
Removing Bottom Bracket

a. Heat the bottom bracket for about one minute to soften Loctite on frame threads.
b. Use a breaker bar to loosen and remove the bottom bracket (clockwise to remove!)
Repair and reassembly notes
You can now re-lube with #2 automotive bearing grease or replace the original BB cartridge. You can also disassemble and replace the bearings. See SB20 - How to Service the Bottom Bracket Cartridge.
I use blue Loctite so that heating is not needed from removal next time.
I tighten the BB to about 55 Nm (40 ft-lbs). It's counter-clockwise to tighten.
If you want to remove the non-drive-side fastener, you can use the same procedure. Removal is in the traditional counter clockwise direction.
Watch the Video
Watch my video to see the complete removal and reassembly procedure.
========
Questions
Where can I get the bottom bracket removal tool?
Try this one: 8 Notch Bottom Bracket Tool on Amazon.
-----------------
Where to get a new bottom bracket?
Edit (July 2024): Getting replacements from Stages may be difficult after the Stages US shut down in April 2024.
July 25, 2024: This vendor has SB20 BBs in stock: Stages Bottom Bracket - Part No. 000-3758. Get 'em while they last 😁.
-----------------
Can the OEM cartridge be disassembled and repaired?
-----------------
When did my BB fail?
It didn't. My 3 4 year old bottom bracket is doing just fine.
I made this blog post and video for a few reasons:
- I wanted give DIY riders some hope that they can replace fix their BB if and when they need to.
- Check the wear on my bottom bracket. Conclusion: Still looking good with no excessive play.
FWIW: The OEM bottom bracket cartridge is well made. The 1 7/8" (47mm) diameter allows large, standard sized bearings to be used. Good for longevity.
----------
What type of Loctite adhesive should I use?

If you plan to remove the cartridge for future inspection or maintenance, use blue Loctite. If you expect the re-installation to be permanent, use the original factory applied red Loctite.
I often choose the blue pill. You need heat - plus some cursing and swearing - to loosen a stuck/seized red Loctite part. I like to avoid the cursing and swearing 🙂.
Here's a good summary of Loctite blue versus red.
===========
Final Thoughts
It's a good idea to keep moisture and sweat away from the axle and BB. Here's what I did: Let's Talk About Sweat.


Comments
Post a Comment