SB20 - Advanced Flywheel Servicing
This post focuses on disassembling the SB20 flywheel to extract the internal electromagnet stator assembly from the flywheel shell.

You can then add grease to the large Flywheel Bearings. You can also replace the Optical Sensor should you need to.
Video
Here's the video.
Who Should Do this Service?
- Anyone who wants to extend their flywheel life. Sealed bearings can last a lifetime without servicing - but they can also fail after a few years. One way to maximize lifespan is to add grease once or twice a decade.
- If you have grinding, clicking and thudding sounds that indicate bearing failure. All SB20 flywheel bearings are inexpensive. None costs more than $5. The service procedure shown can also be used to replace bearings.
- You read the Stages service bulletin on quieting clicking flywheel noises, and want to do a better job.
Difficulty Level
Servicing the Flywheel bearings requires some advanced DIY skills.
I rate the difficulty to be 9 out of 10.

While nothing is technically extreme, I rate this harder than similar tasks for the following reasons:- Risk of damaging the stator - particularly the coils. It is difficult to get replacement parts but easy to hurt these components if you are not careful.
- Special tool required. A 55 mm socket makes this job almost easy. I am afraid that most people with use adjustable wrenches (as suggested by someone at Stages). Be prepared for some cursing and swearing if you go this route.
- Large bearings that are not well secured. Stages glues these bearing in place and pinches them with a metal punch. Knock a bearing out of alignment and you may never know you made things worse.
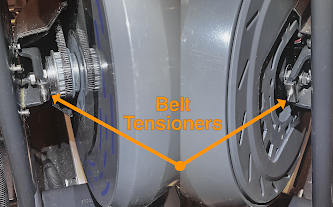
For comparison, I rate Belt tensioning and alignment to be 5 out of 10. Servicing the axle bearings is 7 out of 10.

While nothing is technically extreme, I rate this harder than similar tasks for the following reasons:
- Risk of damaging the stator - particularly the coils. It is difficult to get replacement parts but easy to hurt these components if you are not careful.
- Special tool required. A 55 mm socket makes this job almost easy. I am afraid that most people with use adjustable wrenches (as suggested by someone at Stages). Be prepared for some cursing and swearing if you go this route.
- Large bearings that are not well secured. Stages glues these bearing in place and pinches them with a metal punch. Knock a bearing out of alignment and you may never know you made things worse.
Prerequisite
In a previous post, I described how to service the Stages SB20 smart bike cog and axle bearings.

SB20 - Flywheel Bearing Service
Please review these instructions before considering the maintenance and repairs described in this post.
✅ I assume you have removed axle bearings and cogs before starting the work described below.
________________________
Servicing Details

Flywheel Bearing Service Steps
Servicing Axle and Cog Bearings requires the following steps:
- Complete axle bearing and cogs removal as described in SB20 - Flywheel Bearing Service.
- Secure Flywheel Shell so it does not spin.
- Remove Flywheel Nut and plastic cover.
- Lift out Stator.
- Add grease to Flywheel Bearings.
- Replace Stator.
- Replace Flywheel Nut and plastic cover.
- Slide in Flywheel.
- Complete axle bearing, cogs and bike reassembly as described in SB20 - Flywheel Bearing Service.
Secure the Flywheel

Flywheel Clamp (truly optional but nice-to-have)

Removing the Flywheel

I am not a fan of this approach. My Flywheel Nut required more removal torque than could be leveraged with an adjustable wrench. This method also exposes the delicate electromagnet coils to damage. One slip of the wrench could destroy your stator coils.
Get the Right Tool
Removing the Flywheel Nut is then easy...

Remove the Flywheel Cover

Lifting out the Stator

Adding Grease to the Drive-Side

🔬 In the video, I show a few seconds of effort. It will take several minutes to add enough grease. You can't really add too much grease into this type of bearing. Any excess will leak back out in the unlikely event that you over-saturate the bearing.
Adding Grease to the Non-Drive-Side

Optical Sensor Replacement (if needed)

🔬 If you need to replace the Optical Sensor, now is the time.
Replace Stator

Replace Cover

Replace Flywheel Nut

That's it
Cleaning Up
FAQ
Anytime you replace a bearing in the SB20 flywheel, you should apply Loctite on the outer ring. The exception is the non-drive-side axle bearing. Its outer ring is clamped firmly by the Cap Nut against the Stator shoulder.

In the SB20 design, bearing inner rings are less constrained. They can move or be fixed in place. You can literally use Loctite or grease and get similar performance with similar tradeoffs.

Machine grade NLGI 2 is commonly used in automobile bearings. It has the consistency ot petroleum jelly. It works at high and low speeds. It can withstand higher heat than can be produced by any bike, indoors or out. FWIW: I skip the lithium varieties. Bike bearings are not subjected to enough moisture to require it.
I never use any type of bicycle grease. It could be made out of anything. You have no idea what you are getting - and you won't know until it is too late.
References
🔺 If you need to replace the flywheel shell bearings, see Stages Service Bulletin:
TSB-02202025 – SB20 Flywheel Repair Kit
These instructions are good - just a bit complicated 😀. You can follow this blog post to do most of the work.
_________________
Replacement Bearing Numbers

Flywheel Bearings: 6910Z bearing
Stages Service Documents
TSB-02202025 – SB20 Flywheel Repair Kit


Comments
Post a Comment