Indoor Bike Improvement #10 - SB20 Rocker Plate
10 of 10 - Leaning one way and another

Rocker plates make indoor riding more realistic. I'm not entirely convinced.
Indoor bikes struggle to recreate outdoor resistance, road conditions, pedalling dynamics and acceleration.
I'm not sure that side-to-side movement helps with realism. My personal take is more conservative.
Two years of rocker plate riding has improved my overall comfort and helped with out-of-saddle sprints.
My Journey
I began experimenting with different rocker plate designs in 2021, starting with the following requirements:
✓ Progressive side-to-side movement that offers stronger resistance as you move from the upright or vertical position.
✓ Forward-and-back movement. Many riders claim this is a critical element in real-world riding simulations.
✓ Small footprint. Commercial products are often quite large to accommodate a wide range of bikes. A custom design for my particular bike should be smaller.
✓ It should remain easy to get on and off the bike.
✓ Come to think of it, installation should be easy too. It should take a few seconds - and not 30+ minutes - to add or remove everything.
✓ Low cost. $120 was my target cost.
Stable Indoor Bike
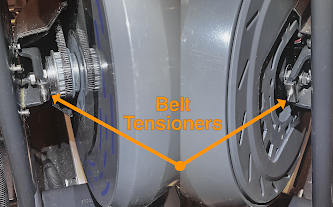
I have a Stages SB20 smart bike. It is based on a commercial gym bike frame that is one of the most rigid and stable platforms on the market.
Q: Doesn't a rocker plate contradict a stable bike design? A: Solid is good. A stable bike can inspire confidence. You never feel like you will fall over - even during intense efforts. There is also a sensation that every pedal stroke produces optimal power with no wasted motion.
For me, a couple of things are missing with a super-stable bike:
- No ability to pull the bike up toward the active leg in a standing sprint.
- Comfort that comes from minor repositioning in each pedal revolution.
- A little side-to-side movement that can be a good thing if stability doesn't suffer.
After giving it some thought, I decided to change update one of my requirements:
✓ Progressive Stable and balanced side-to-side movement that offers stronger resistance as you move from the upright or vertical position.
Commercial Trial
I went to a local bike dealer to try commercial rocker plate (KOM RPV1) + trainer combination. It had reasonable side-to-side motion using an adjustable air bladder. I could do better sprint movements on this bike. It was hard to tell if comfort was appreciably better. This rocker plate also had a forward-and-back movement option that I found interesting but unconvincing.
As a result of this trial, I decided to remove a requirement:
✓ Look into forward-and-back movement.
I plan to revisit this requirement in a future iteration.
Version 1 "Foam Pads"
This first version of my DIY rocker pad leveraged the stability and stiffness of the Stages SB20 bike. It allowed for a minimal footprint using a very simple design: 4 foam pads. See the video for more.
This design worked surprisingly well. Side-to-side motion was good - about 15 degrees in each direction. Installation really did take just seconds. Getting on and off the bike didn't change. The increase in footprint was barely noticeable.
This prototype was far from perfect. Limitations included:
- Only linear resistance with no progressive resistance until the bike was close its limit.
- Motion was stiff and rebound was too fast (poor dampening).
- Bike would move around on the floor during heavy sprints.
- Foam pads compressed when sitting idle (the SB20 bike is HEAVY).
Version 2 "Rock & Ride II"
This iteration added:
- Aluminum frame to hold foam pads in place during intense efforts.
- Thicker dual density foam to provide earlier progressive resistance and better dampening.
- Center support to increase stability and eliminate foam compression when sitting idle.
- Wider range of movement (up to 20 degrees) with no loss of stability.
- No appreciable change in footprint.
- Still easy to get on and off the bike.
- Installation is actually faster.
- Looks kinda cool (IMHO)
Parts List (Some assembly required 😀)
- Diamond Plate Sheet
- Aluminum Angle
- Aluminum Channel (4 small pieces for centre support - didn't buy because I had them lying around)
- Kneeling Pad 1 (Soft foam pad)
- Kneeling Pad 2 (Stiff foam pad)


Comments
Post a Comment